This post contains affiliate links. If you purchase through our links, we may earn a commission at no extra cost to you.
TL;DR: AI Product Photography in 2026
- The Goal: Eliminate $100/photo studio costs using AI tools.
- The Stack: Take a phone photo → Remove background in Canva → Generate lifestyle scenes in Midjourney or Adobe Firefly.
- Key Tools: Canva Pro ($14.99/mo), Adobe Firefly ($9.99/mo), Midjourney ($10/mo), and Flair.ai for model placement.
- The Result: Professional-grade “hero” images and lifestyle shots for pennies per image.
For e-commerce owners, the “product photoshoot” has historically been a recurring nightmare. You have to hire a photographer, rent a studio, find props, coordinate shipping for samples, and wait weeks for the edited files. For a small business or a solo founder, the cost of a single professional “hero” shot can easily reach $100 or more.
In 2026, you can get those same professional results—often with better creative control—for pennies per image.
AI hasn’t just improved; it has fundamentally changed the physics of e-commerce imagery. You no longer need a physical set to create a “vibe.” You can take a simple photo of your product with your smartphone in your kitchen and use AI to place it in a high-end lifestyle setting, a cinematic background, or even in the hands of a hyper-realistic model—without ever leaving your office.
Here is how to master the 2026 AI product photography workflow to get world-class shots on a “bootstrapped” budget.
The 2026 Pricing Reality: What Does “Budget” Mean Now?
Before we dive into the workflows, let’s look at the costs. In 2026, the “AI Product Photography Stack” is remarkably affordable compared to traditional photography:
- Canva Pro: $14.99/mo. Essential for background removal, basic “Magic Media” generation, and layout.
- Adobe Firefly (Standard): $9.99/mo. The industry standard for “Generative Fill” and commercially safe image expansion.
- Midjourney (Basic): $10/mo. The gold standard for high-end, artistic “Hero” visuals and cinematic lighting.
- Dedicated Tools (Flair.ai, Pixelcut, Mokker): Most offer free tiers with paid plans starting around $15–$30/mo for high-volume users.
For less than $50 a month, you have a virtual photo studio that can produce thousands of images. Compare that to a single $500 day-rate for a photographer, and the ROI becomes undeniable.
1. The “Zero-Budget” Lifestyle Shot
You don’t need to rent a beach house or a luxury kitchen to show your product “in the wild.”
The Workflow:
The foundation of a good AI lifestyle shot is a clean “source” image. Use your smartphone (modern iPhones and Androids have more than enough resolution) and take a photo of your product on a plain, neutral background. A white tabletop or even a piece of poster board works perfectly.
The AI Step:
Once you have your source photo, upload it to Adobe Firefly or Canva’s “Magic Edit.”
- Use the Background Remover to isolate your product.
- Use the Generative Fill or Text-to-Image tool.
- The Prompt: Be specific about the lighting and materials. Instead of saying “in a kitchen,” try: “Place this product on a rustic dark oak table in a sunlit Scandinavian kitchen, soft morning light, bokeh (blurred) plants in the background, 8k resolution.”
The Result:
The AI doesn’t just “paste” the product; modern tools calculate the light spill from the environment onto the product’s surface, making it look like it was actually there.
2. Model Replacement: Professional Humans (Without the Humans)
Hiring models involves more than just their hourly rate. You have to manage hair and makeup, lighting, and complex legal contracts for “usage rights.” If you want to change the model’s ethnicity or age for a different market, you have to do a whole new shoot.
The Workflow:
Use a dedicated AI product tool like Flair.ai or Mokker.ai. These platforms are specifically built for e-commerce.
The AI Step:
- Upload your product photo.
- Select a “Hand” or “Model” template. You can choose from a library of pre-set poses.
- The AI will “stitch” your product into the model’s hand or place it on a shoulder.
The Result:
You get a high-converting “human touch” image. In 2026, AI models are virtually indistinguishable from real humans in product shots, especially when the focus is on the product itself. This allows you to localize your marketing—showing a model that resonates with your specific target demographic in seconds.
3. High-End “Hero” Visuals with Midjourney
Every homepage needs a “Hero” image—that one spectacular visual that stops the scroll and defines the brand. This is where Midjourney shines. While Canva is for “utility,” Midjourney is for “art.”
The Workflow:
Midjourney v6.0 and beyond excels at “Image References.”
- Upload your basic product photo to a private Discord server or the Midjourney web interface.
- Copy the URL of that image.
- Use the
/imaginecommand and paste the URL first, followed by your prompt.
The Prompt:
To get that “luxury” look, use “Power Words” related to high-end photography:
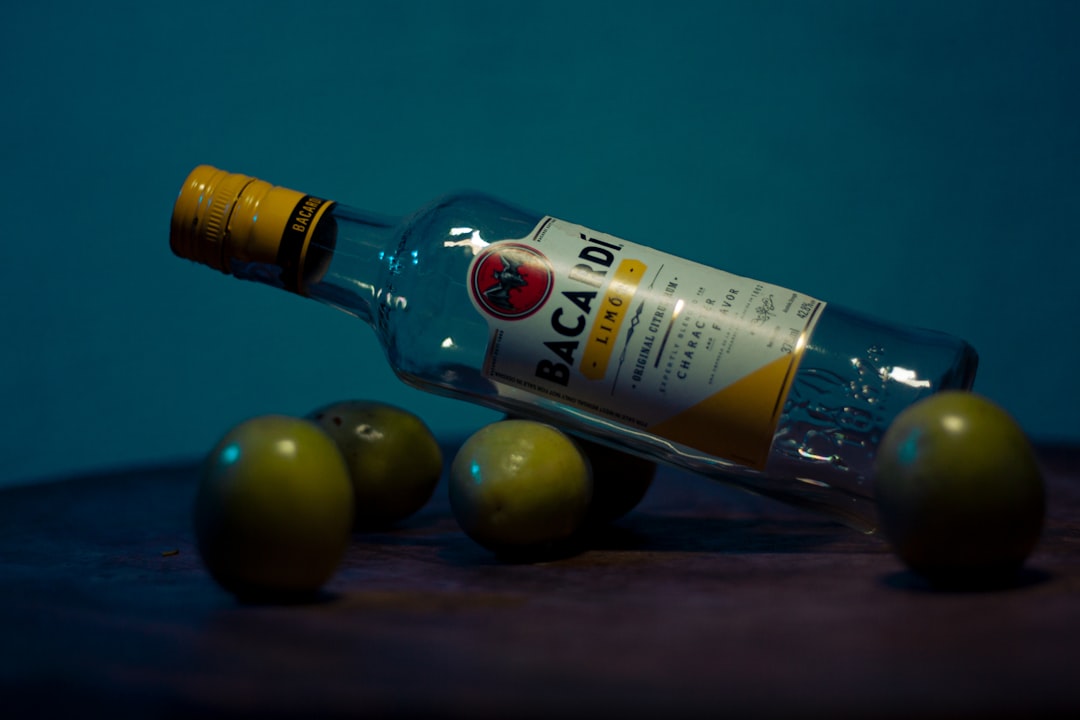
“[Image URL] A cinematic close-up of this bottle, floating in a sea of liquid gold and silk ribbons, dramatic chiaroscuro lighting, high-end perfume advertisement style, shot on 35mm lens, f/1.8, 8k resolution –ar 16:9 –v 6.0”
The Result:
Midjourney will generate four variations of an image that looks like it cost $5,000 to produce in a professional studio with a high-speed camera and liquid stylists.
4. Seasonal Updates in Seconds
One of the biggest drains on an e-commerce budget is the need for “seasonal” content. You need pumpkins for October, snow for December, and flowers for April. Historically, this meant quarterly photoshoots.
The Workflow:
Take your existing “winning” product shots and use Adobe Firefly’s “Generative Expand” or “Generative Fill.”
The AI Step:
- Open your standard product photo.
- Select the background area (leave the product untouched).
- The Seasonal Prompt:
- For Winter: “Add frosted pine branches, warm glowing fairy lights, and a light dusting of snow.”
- For Summer: “Change the background to a bright sandy beach with turquoise water and tropical palm shadows.”
The Result:
You can refresh your entire website and social media feed for every holiday and season without ever taking a new photo. This keeps your brand looking “fresh” and relevant to the current date, which significantly boosts consumer trust.
5. Mastering Physics: Shadows, Reflections, and Depth
The “Uncanny Valley” of AI photography—where an image looks “almost” real but feels “off”—is usually caused by a lack of shadows or improper reflections. If a bottle is sitting on a marble table but doesn’t have a reflection, the human brain knows it’s a fake.
The Workflow:
Use a tool like Pixelcut or the advanced settings in Adobe Firefly.
The AI Step:
Modern AI tools have “Light Source” awareness. When you generate a background, look for settings that allow you to “Match Lighting.”
* If your product was photographed with light coming from the left, your AI background must also have light coming from the left.
* Use “Shadow Generation” features that allow you to adjust the “softness” and “distance” of the shadow.
The Result:
By spending an extra 60 seconds adjusting the shadow and reflection, you move from a “decent AI edit” to a “professional photograph.”
3 Tips for “Realistic” AI Product Photography
- Start with a High-Quality Source: AI is a “multiplier,” not a “miracle worker.” If your original photo is blurry or has heavy “noise” from low light, the AI will struggle to blend it realistically. Take your initial photo in bright, natural sunlight.
- The “Material” Prompt: When writing prompts, tell the AI what the product is made of. If it’s a glass bottle, add “caustics” or “refractions” to the prompt. If it’s a fabric bag, add “soft texture” or “knit details.”
- Use “Negative Prompts”: If you’re getting weird results (like the AI trying to add extra arms to a model or text to your product), use the negative prompt feature (e.g.,
--no text, --no distorted limbs, --no blur).
Advanced Strategy: The “Batch” Workflow
If you have 50 products in your catalog, don’t do them one by one. Use tools like Flair.ai or Bulk.ai to create “Brand Templates.”
* Define your “Brand Look” once (e.g., “Minimalist, Concrete, Soft Shadows”).
* Upload your entire product library.
* The AI will apply that exact same look to every single item, ensuring your “Shop All” page looks perfectly cohesive.
FAQ: AI Product Photography
1. Is AI product photography better than hiring a professional?
For 90% of e-commerce needs (social media, Amazon listings, blog posts), AI is the superior choice because of the speed and cost. However, for “Hero” brand launches, extremely reflective items (like fine jewelry), or products where the exact texture is the selling point (like high-end leather), a human photographer’s eye for micro-detail is still worth the investment.
2. Is it legal to use AI models for my brand?
Yes, provided you are using tools trained on ethical datasets. Adobe Firefly is specifically designed for commercial use and is trained on Adobe Stock images, meaning you won’t run into copyright issues. Most dedicated AI model tools like Flair.ai also provide commercial usage rights in their paid plans.
3. Which tool is easiest for a complete beginner?
Canva Magic Studio is the easiest entry point. Their “Magic Edit” and “Magic Expand” tools are very intuitive and require almost no learning curve. If you can use a paintbrush tool, you can use Canva AI.
4. Will customers know the photos are AI-generated?
In 2026, if done correctly, no. The key is the “Shadow and Reflection” step mentioned in Way #5. Most “obvious” AI photos fail because the lighting on the product doesn’t match the lighting in the background. If you match the light, the image is indistinguishable from reality.
5. Does Midjourney cost more for high-resolution images?
The Basic Plan ($10/mo) gives you plenty of “Fast GPU” time for standard product shots. If you are generating hundreds of high-res “Upscaled” images, you might need the Pro Plan ($60/mo), but for most small businesses, the Basic or Standard ($30/mo) tiers are more than enough.
Related Reading
- Best AI Visual Content Tools for Small Businesses (Pillar Guide)
- Midjourney for Business: A Complete Guide to AI Images
- Canva Magic Studio vs. Adobe Firefly: Which is Better for Your Brand?
- The Best Free AI Design Tools for Small Business Owners
- How to Use AI Video to Turn Your Product Photos into Social Ads